Showing posts with label Gift Bag. Show all posts

Wednesday, April 11, 2018

Baby Shower Gift Bag


I make a baby blanket for almost every new mom I know. It's a rag quilt made of five fun flannel prints that coordinate. This one is for a baby girl named Micah. I hope you can see her name, gold-embossed using the Labeler Alphabet stamp set.


The sunflower package tie was my inspiration. I found a plain paper gift bag, added the flower and then built my tag. I used Very Vanilla card stock, some Very Vanilla Lace Trim and my Scalloped Circle with sentiment from Moon Baby. I thought it needed a little something at the top, so I tied a bow from the 1/4" Copper Trim.

I hope you liked looking at my project today. Please come back again very soon. If you don't want to miss a post, please sign up on my side bar so you can receive my emails when I post.

Please use my Online Store any time you want to place a Stampin' Up! order.


post signature

Saturday, July 11, 2015

Masked Hearts on Glassine Tutorial


 Here is my super cute bag, perfect for gifts of the small kind, OR a gift card. I used one Glassine Sheet and the Hearts Decorative Mask sheet with White Craft Ink to decorate the sheet before die cutting it with the Mini Treat Bag Framelits.


First I placed my Glassine Sheet evenly on my grid surface. I taped it in place so it wouldn't move.

Use the grid to evenly place your stamped images. I do not remember which heart I used! Can you spot it? I let the hearts dry for hours and hours to be sure they would not smudge. Then just die cut using the Mini Treat Bag Framelits and put together. Embellish as you like. 

I hope you like my gift bag. Please leave your comments below-they always make my day!

For your own Stampin' Up! supplies, please use my Online Store. 

Built for Free Using: My Stampin Blog


post signature

Wednesday, August 27, 2014

Gift Bag Tag


Happy Day! A friend is celebrating a birthday and I love using these Chevron Tag a Bag Gift Bags. They go with any color scheme and hold a variety of items like gifts or treats.


Who says Wondrous Wreath is only for Christmas? I stamped the bottom layer of leaves in Pistachio Pudding ink, the next layer in Calypso Coral (stamped off) and then the berries in full on Calypso Coral. I cut the wreath out perfectly by using the Wonderful Wreath Framelits Dies. My sentiment is from Flamingo Lingo. It's cut out perfeclty using Bitty Banners Framelits. I tied a piece of Cotton Ribbon in a knot and then added a Calypso Coral Seam Binding Ribbon tie over the knot. Isn't it pretty?

Thank you for visiting today! I hope you will take a moment to leave a comment. The comments keep me going!

For any Stampin' Up! products delivered right to your home, please use my Online Store.


SHORT AND SWEET:  Purchase the Stampin' Up! Starter Kit for $99 through August 28th and you will receive $150 worth of products (of your choosing) with no further obligation to buy or sell! What a deal!

Also, Paper Pumpkin NEW subscriptions are Half Off 2 when you sign up by September 10th!


Been waiting for a deal on the Big Shot? Now is the time to receive a free Stamp and Framelits Bundle when you order the Big Shot. Only through August 31st!

post signature

Wednesday, January 9, 2013

Artisan Embellishments for the Paper Players


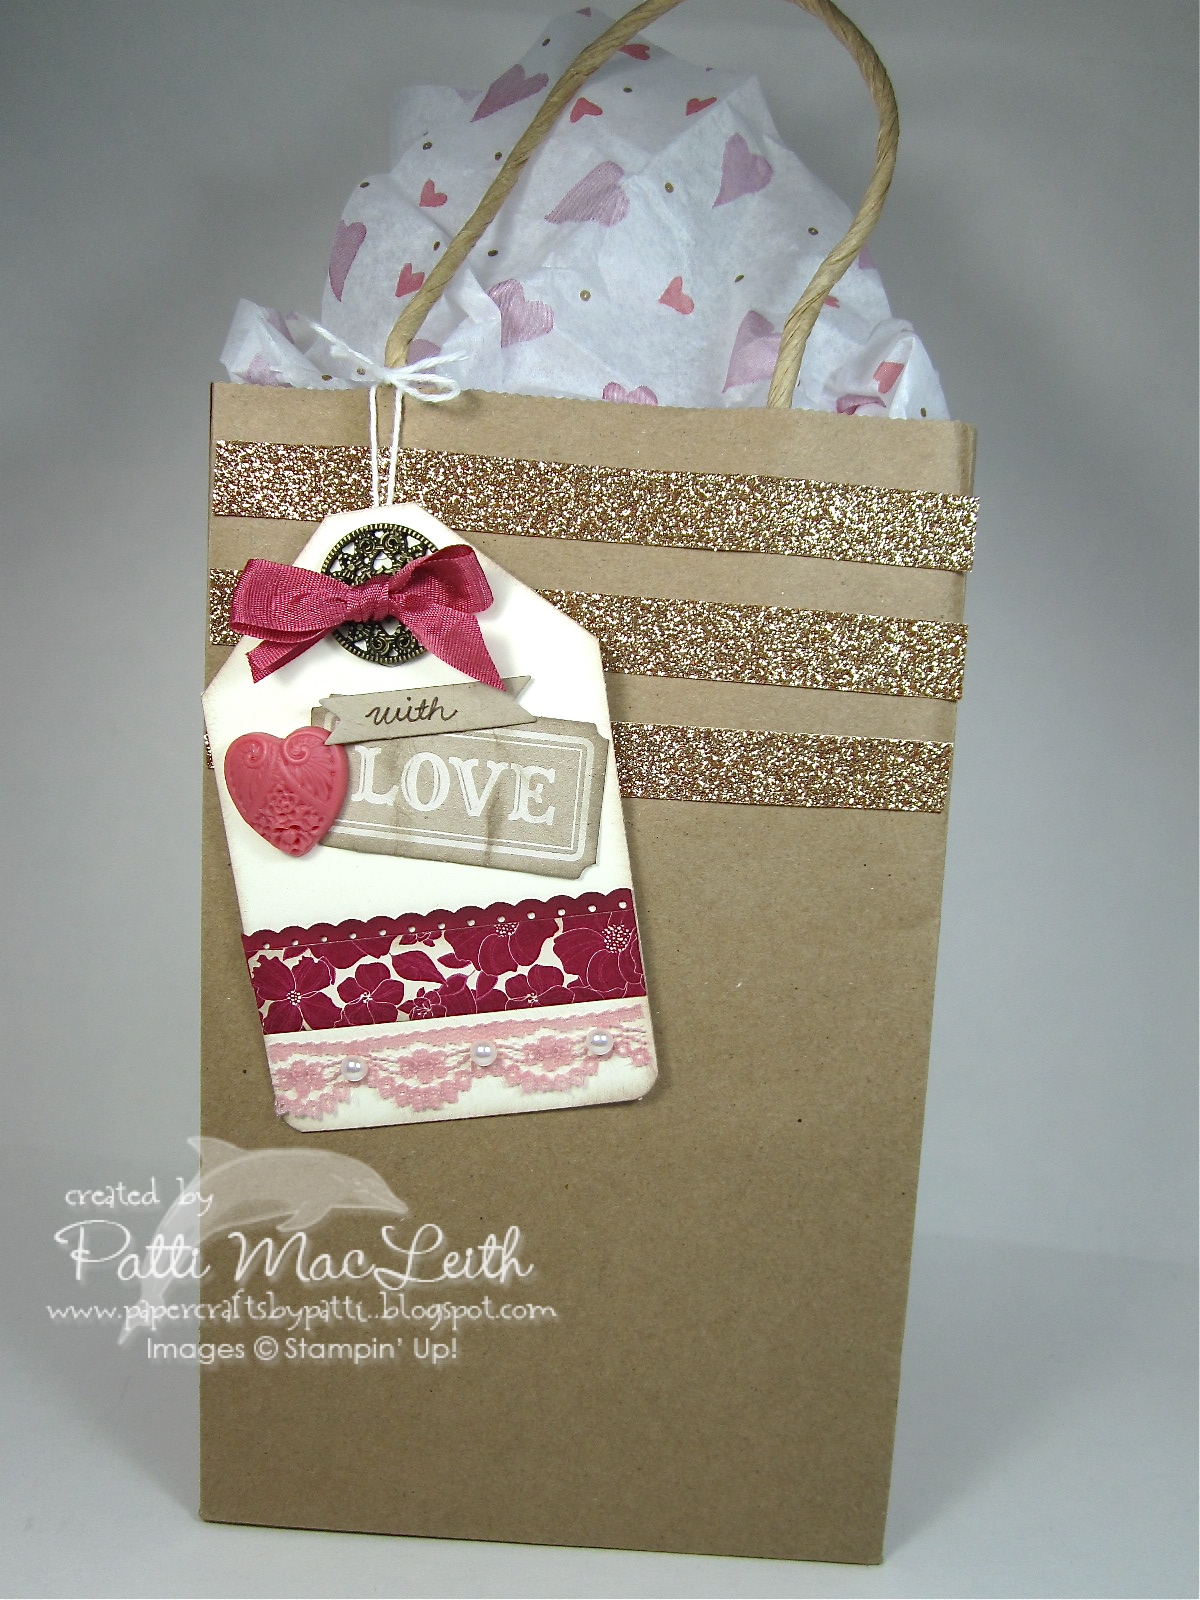
Good morning and welcome to my blog! I was challenged this week by the Paper Players blog theme "Love is the Air." I submit this LOVEly gift tag that I made to decorate a bag with a house warming gift inside! Most of the elements come from the Artisan Embellishments Kit found on pg. 10 (129328 $9.95) of the Spring Catalog. I am so glad I ordered TWO, because I'm almost finished using up my first one! The lace in this kit is heavenly and you won't find it anywhere else! You can make so many different items using this kit--it's very economical.


I began with a Very Vanilla card stock base, which I free-hand cut to look like a tag. I rounded the bottom corners and distressed the edges with a sponge dauber and Chocolate Chip ink.

I added a single rose from the 5/8" Flower Trim. I tied a bow through the button (look closely at the button--there are hearts!) using a piece of the Primrose Petals Seam Binding from the Artisan Embellishments Kit.

There is a Raspberry Ripple dotted scallop border peeking above a snippet of Print Poetry Designer Series Paper from the paper stack. Under that is the final element, Primrose Petals Scalloped Lace that I adorned with pearls.


Here is the bag with the completed tag. It's a brown paper bag that I added some pizzazz to by adding Champagne Glitter stripes across the top. These were just scraps I had kept from other projects cut to fit across the bag.

I hope you enjoyed my Paper Players project and thank you for visiting my blog! Visit the PP blog to see all of the interesting, beautiful and inspiring projects the design team and participants have posted. Maybe you will create with "Love is in the Air" in mind!

Don't forget to check out my Gift Cards for sale on my Cards for Sale tab above! 

For all of your Stampin' Up! supplies, I invite you to use my Website.
See you next time!

Wednesday, November 14, 2012

PPA Preview and Christmas Tags


I'm excited to show you a sneak preview of this week's challenge from Pals Paper Arts! Be sure and come back tomorrow and see the full card. Also, check out the Pals site and see what each Design Team member has come up with! Be inspired!


A quick post to show you some very easy gift tags for Christmas gifts. I used the Heart of Christmas (single stamp) inked in Early Espresso. I die cut it using one of the Apothecary Accents Framelits. Then I cut one "tab" off of the die cut and it looks just like a tag you would buy. I used Very Vanilla 1/8" taffeta ribbon to tie it onto my sparkly bag. The Champagne Glimmer Paper is what makes it sparkle!


My second bag is the same base with Champagne Glimmer Paper, but the tag is filled in differently. I used a Real Red Stampin' Write Marker to color just the words "It's Christmas" from the Heart of Christmas single stamp. Then I added the "to" and "from" that is in the (retired) Winter Post stamp set. It was inked in Gumball Green ink. The tag is tied onto the bag using (retired) Pear Pizzazz 1/2" seam binding.

I hope you enjoyed my tags and bags and that you will leave a comment for me to read.