Showing posts with label Party Favor. Show all posts

Friday, May 22, 2026

Teeny Tiny Tic Tac Tote

These are some fun favors I made for a recent gathering, using Julie DiMatteo's Tutorial. I used the Mixed Up Patterns Designer Series Paper. I chose the lovely blue floral pattern to match some ribbon snippets I had leftover. These little boxes came together so quickly from a 4 x 6" piece of DSP. Inside I put some teeny Tic Tac containers that I ordered from Amazon. Many tiny treats could fit inside this 2" wide, 2.25" tall, 1/2" wide box/bag.


Thanks for looking today. I hope you are having fun creating using your Stampin' Up! supplies. Please let me know if you have any questions about my projects.  


For Details, click here


post signature

Wednesday, April 19, 2023

Free Shipping and Treats to Behold

Today's project are these adorable spring treat boxes, created easily and quickly using the Pretty Pillowbox Dies, which are retiring and which you can add to your order and get *free shipping* (with a $75 purchase) today only! Only until 11:59pm Mountain Time TODAY, April 19th, so place your order early!

Order now for best selection of retiring items! They sell out, especially when there is an offer like FREE SHIPPING!!

Tag and Flowers are in the die set!


156321

PRETTY PILLOWBOX DIES

$20.40 (regularly $34.00)


Thank you for looking today! Please use my Online Store to order your products!


post signature

Wednesday, March 22, 2023

Spring Green!

Sentiment is from Charming Sentiments Stamp Set

I may be late with this post, but I still think my project can help inspire you to share what you love to do. This is a treat holder that I made to fit a package of two Mint Milano cookies. I gave these out at an event this month. You can change out the treat or decoration on the front to suit your needs.

All you need do is measure how high and long your treat is, then create a measurement with score lines where necessary. Don't forget to add about 1/2" for a fold over flap to glue it closed on one side. It's open on both ends and your treat slides in and out using the ribbon tied vertically around the center. I used two kinds of ribbon for this, one gathered (green) and tied with the other (black and white gingham)


post signature

Wednesday, November 17, 2021

Seasonal Sale SHOP NOW and Cute Fall Favors


Today's favor was made to cover a larger size lip balm. Julie DiMatteo always has excellent instructions and patterns on her blog and I used her pattern and had my husband enlarge it for me. I cannot give out my directions (they are very messy and only I could understand them!), but you could use hers as your base and go from there.


Stampin' Up!'s Seasonal Sale is on! You are able to stock up and save! Enjoy10% off card stock, 15% off ink pads (excluding bundles and third-party pads) and 20% off dies! Shop NOW and don't forget that gift giving season is upon us, so make sure you get something for every crafter on your list! (Sale ends November 18).


Use my Online Store any time to order for yourself or your friends and family! Don't forget about the excellent Starter Kit promotion now through November 30th. Choose your $125 in products and pay just $75 and get free shipping. Combine with our Seasonal Sale to save the most! 

Please contact me if you have any questions regarding the Starter Kit OR the Seasonal Sale. I'd be glad to help you find the best products to suit your needs, or help you choose gifts for that special someone in your life!


post signature

Wednesday, August 18, 2021

Daisy Lane Favor Boxes

These are retired Stampin' Up! favor boxes that I had just enough of to fill and give out to my Workshop attendees. I love gathering to stamp and it gives me an opportunity to create something 3D. Here I filled the boxes with Hershey's Kisses, then wrapped them with a 1" strip of Early Espresso card stock that I ran through my Big Shot with the Timer 3D Embossing Folder. I added two stamped and punched daisies which are popped up and sparkled up using the largest of the Gilded Gems.

I added the sweet Granny Apple Green die cut from the Intricate Leaves Dies. The flower colors are: Melon Mambo, Flirty Flamingo, Mango Melody and Crushed Curry.

Click HERE to view and save the Sale-A-Bration Brochure

Do you have a long wish list? Sale-A-Bration is an excellent time to get more for your money! From August 3 to September 30, 2021, purchase a Starter Kit for just $99. YOU CHOOSE $125 worth of products and get free shipping! (That's $26 in free products!) PLUS: Add your choice of one FREE bundle from the list below. Bundles range in value from $31.50 to $60.25. Your kit ships FREE (Another 10% savings) right to your door. 

Click HERE to view the FREE PRODUCT BUNDLES you can receive by purchasing a Starter Kit 

I welcome hobby stampers to my group and I am supported by a large group of people who love to stamp. We have private FB groups and lots of social interaction virtually and in person, so if you like to stamp, I'd like you on my team! Thank you for stopping by today! Please let me know if you have any questions about my projects or our Stampin' Up! products. Please use my Online Store any time to have your stamps and ink delivered right to your door!

post signature


Wednesday, February 26, 2020

Detailed Honey Bee Favor

I love how the bee looks die cut on Black Foil Paper

Today's project is a candy favor made with a rectangular piece of Golden Honey Specialty designer series paper (available as a free product with purchase from Sale-A-Bration), Black Foil paper and Gold Glimmer paper cut with the Detailed Bee dies. You see the stamped beehive from the Honey Bee stamp set. Without much effort you have a beautiful, sparkly and shiny favor for any event.


I hope you were inspired today! Please use my Online Store any time for your orders. During Sale-A-Bration for every $50 in product you order, you will earn one free item.


post signature

Wednesday, December 11, 2019

Christmas Gift Tote and TODAY only! Free Shipping

ONE DAY ONLY!  24 HOUR FLASH SALE!

Wednesday, December 11, 2019

12:01 am (MT)–11:59 pm (MT)

Get FREE SHIPPING on all orders over $50 (total before tax).

Click Here to place an order in my online store.


Pinterest helped me find this CUTE gift tote by Helen Read that is made from a Kraft Pillow Box. The box is flat when you take it from the package. I then used my brayer to ink it with Real Red ink. I let it dry overnight.

While the box is still flat, I used the Story Label Punch and placed one end of the box all the way inside the punch. Punch out both layers and save them for another project. 

I added the tag using a sentiment from the Perfectly Plaid stamp set. I punched it out using the Story Label Punch and added an extra tag of Old Olive card stock. I stamped and punched two trees from the same stamp set using the Pine Tree Punch. I added a bow tied with Polka Dot Tulle Ribbon and a Jingle Bell from the Holiday Catalog.

Fold up the bottom of the box and fill with goodies. I gave away a tube of hand lotion and a holiday emery board. What will you put in yours?

Thank you for stopping by today. Please use my Online Store any time for your own Stampin' Up ! products. Remember today only- FREE SHIPPING!!


post signature

Friday, October 25, 2019

Halloween Treat Boxes


All of the above projects were made using instructions from an Erica Cerwin class. I purchased her instructions and used the Spooktacular Bash stamp, the Ornate Frames Dies, the Monster Bash Designer Series Paper, Monster Bash Enamel Shapes and Black Foil Sheets to complete these cute boxes. I have handed the out with various goodies inside.

 If you are interested in making boxes as favors or for small gifts, there are TONS of instructions out there, just search on YouTube or Splitcoast for complete instructions, tutorials and videos to help you create your boxes and then decorate them using your Stampin' Up! supplies, which you can purchase using my Online Store

Thank you for looking today! I hope you were inspired! 


post signature

Monday, January 28, 2019

Tic Tac Holder for Valentine's Day


These Tic Tac holders made great place cards at my recent Stampin' Up! workshop. Are you in Orange County, CA and needing a monthly creative outlet? You are invited to come to my workshops! We always make three cards and have a great time. I usually make some sort of take away favor for each of my guests! Let me know if you would like to be on my invitation email list!


The pattern for these lovely boxes came from Erica Cerwin. I love the special people who constantly engineer boxes to put treats in! They buy a product and then figure out how to "wrap" it in paper! One of my favorite things! I love playing with paper!

Thanks for visiting today! I would love to read your comments, so please leave me one!

Use my Online Store to order your Stampin' Up! products!

post signature

Saturday, September 8, 2018

Sweet Christmas Gift Tags In a Cute Box


I know it's early to be making Christmas Projects, but I received my Holiday Catalog pre-order weeks ago and I just couldn't help but play with the Festive Farmhouse Suite along with the Peaceful Noel and Feather & Frost stamp sets! I had an inaugural gathering in my new Craft Studio and I wanted to have a fun project for the ladies to take home.

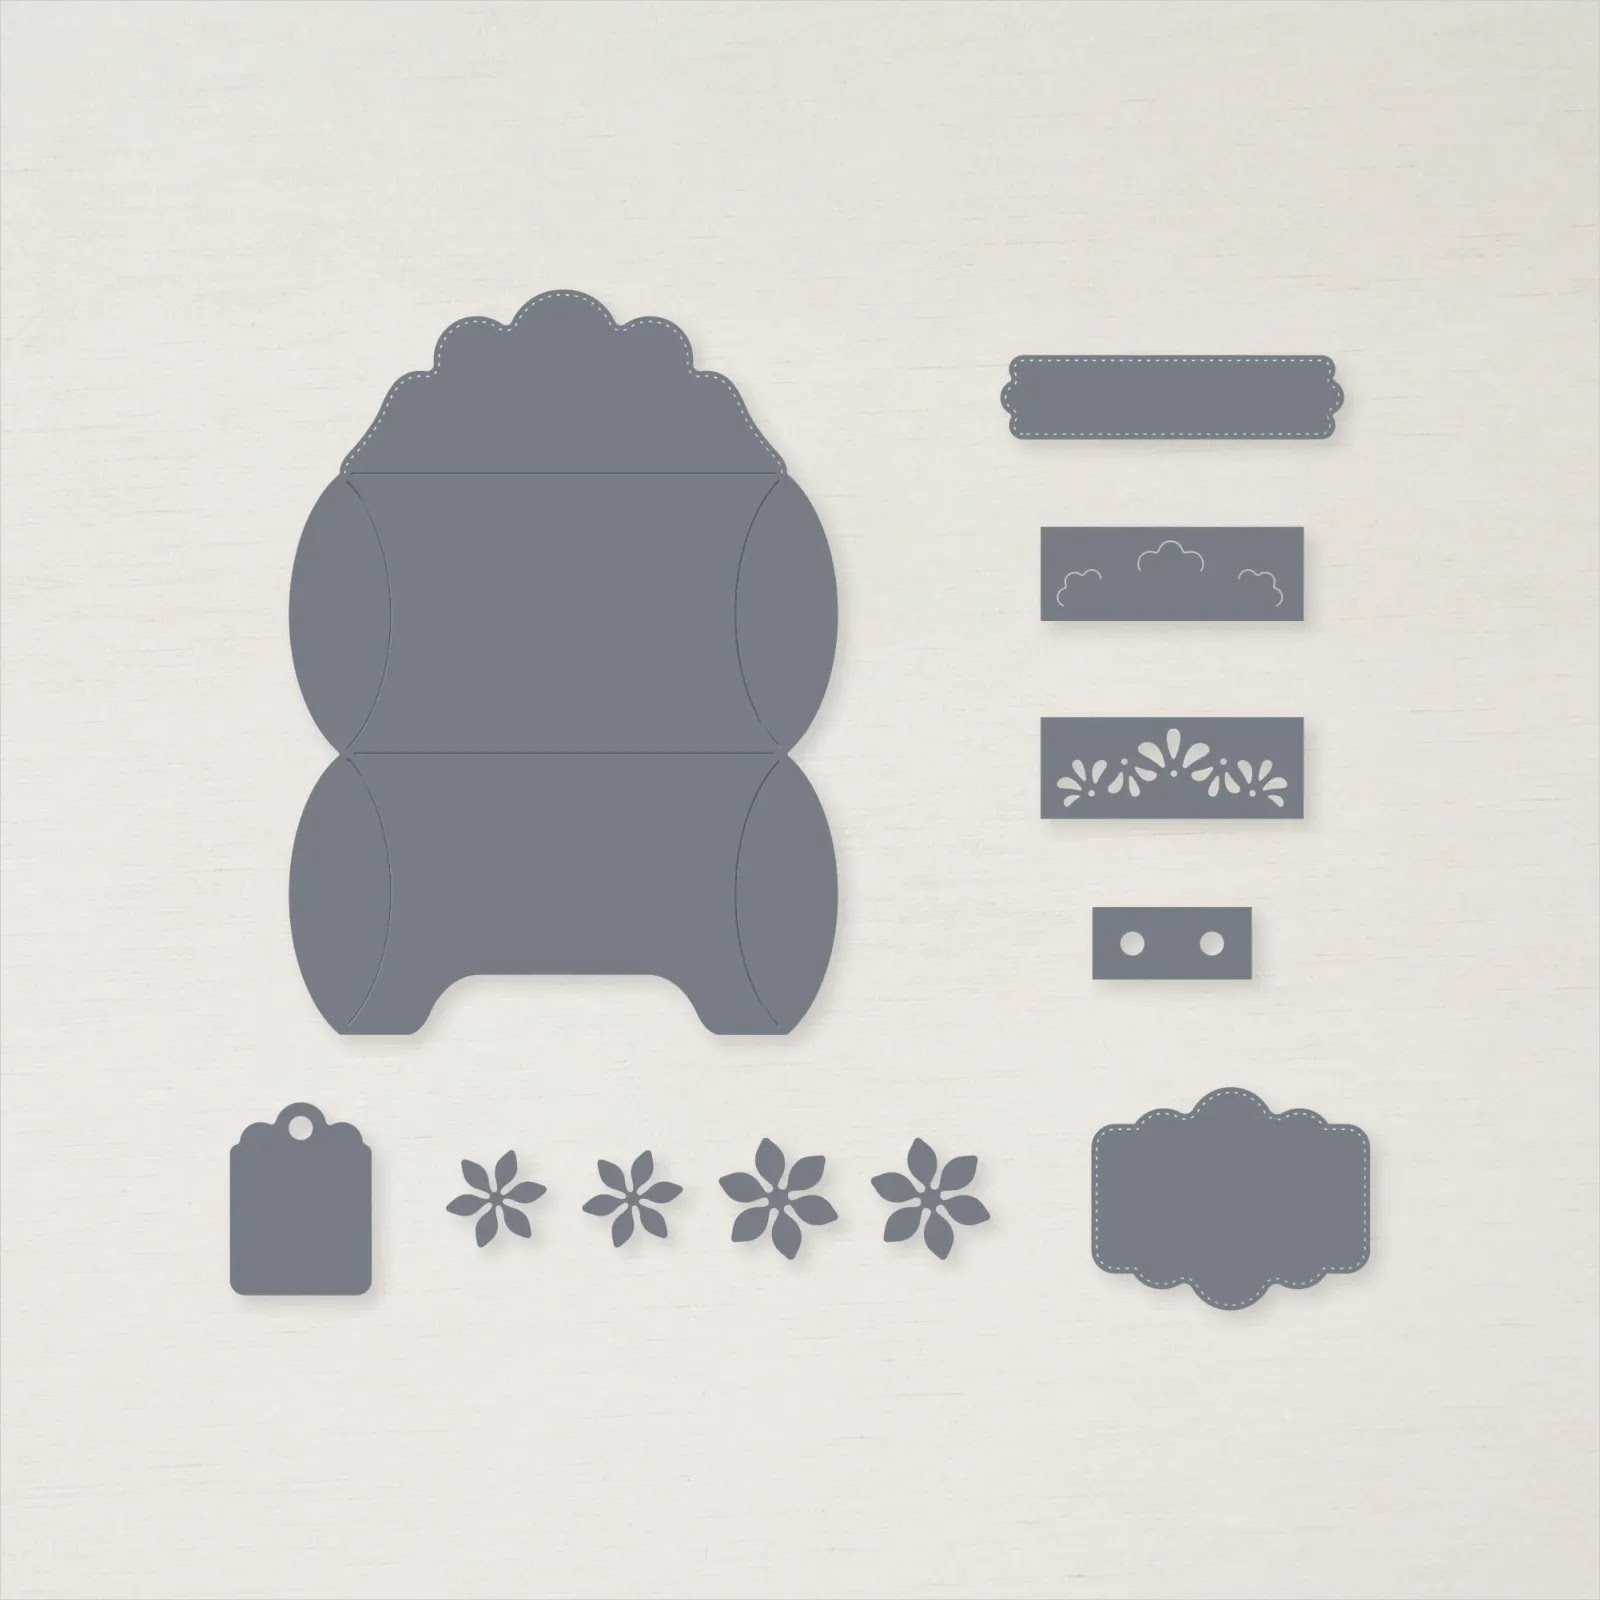
The new Corrugated Dynamic Textured Impressions Embossing Folder was used on top of this box. See those wonderful stitches on the banner with the star print from the Festive Farmhouse DSP? That is from the Farmhouse Framelits Dies!


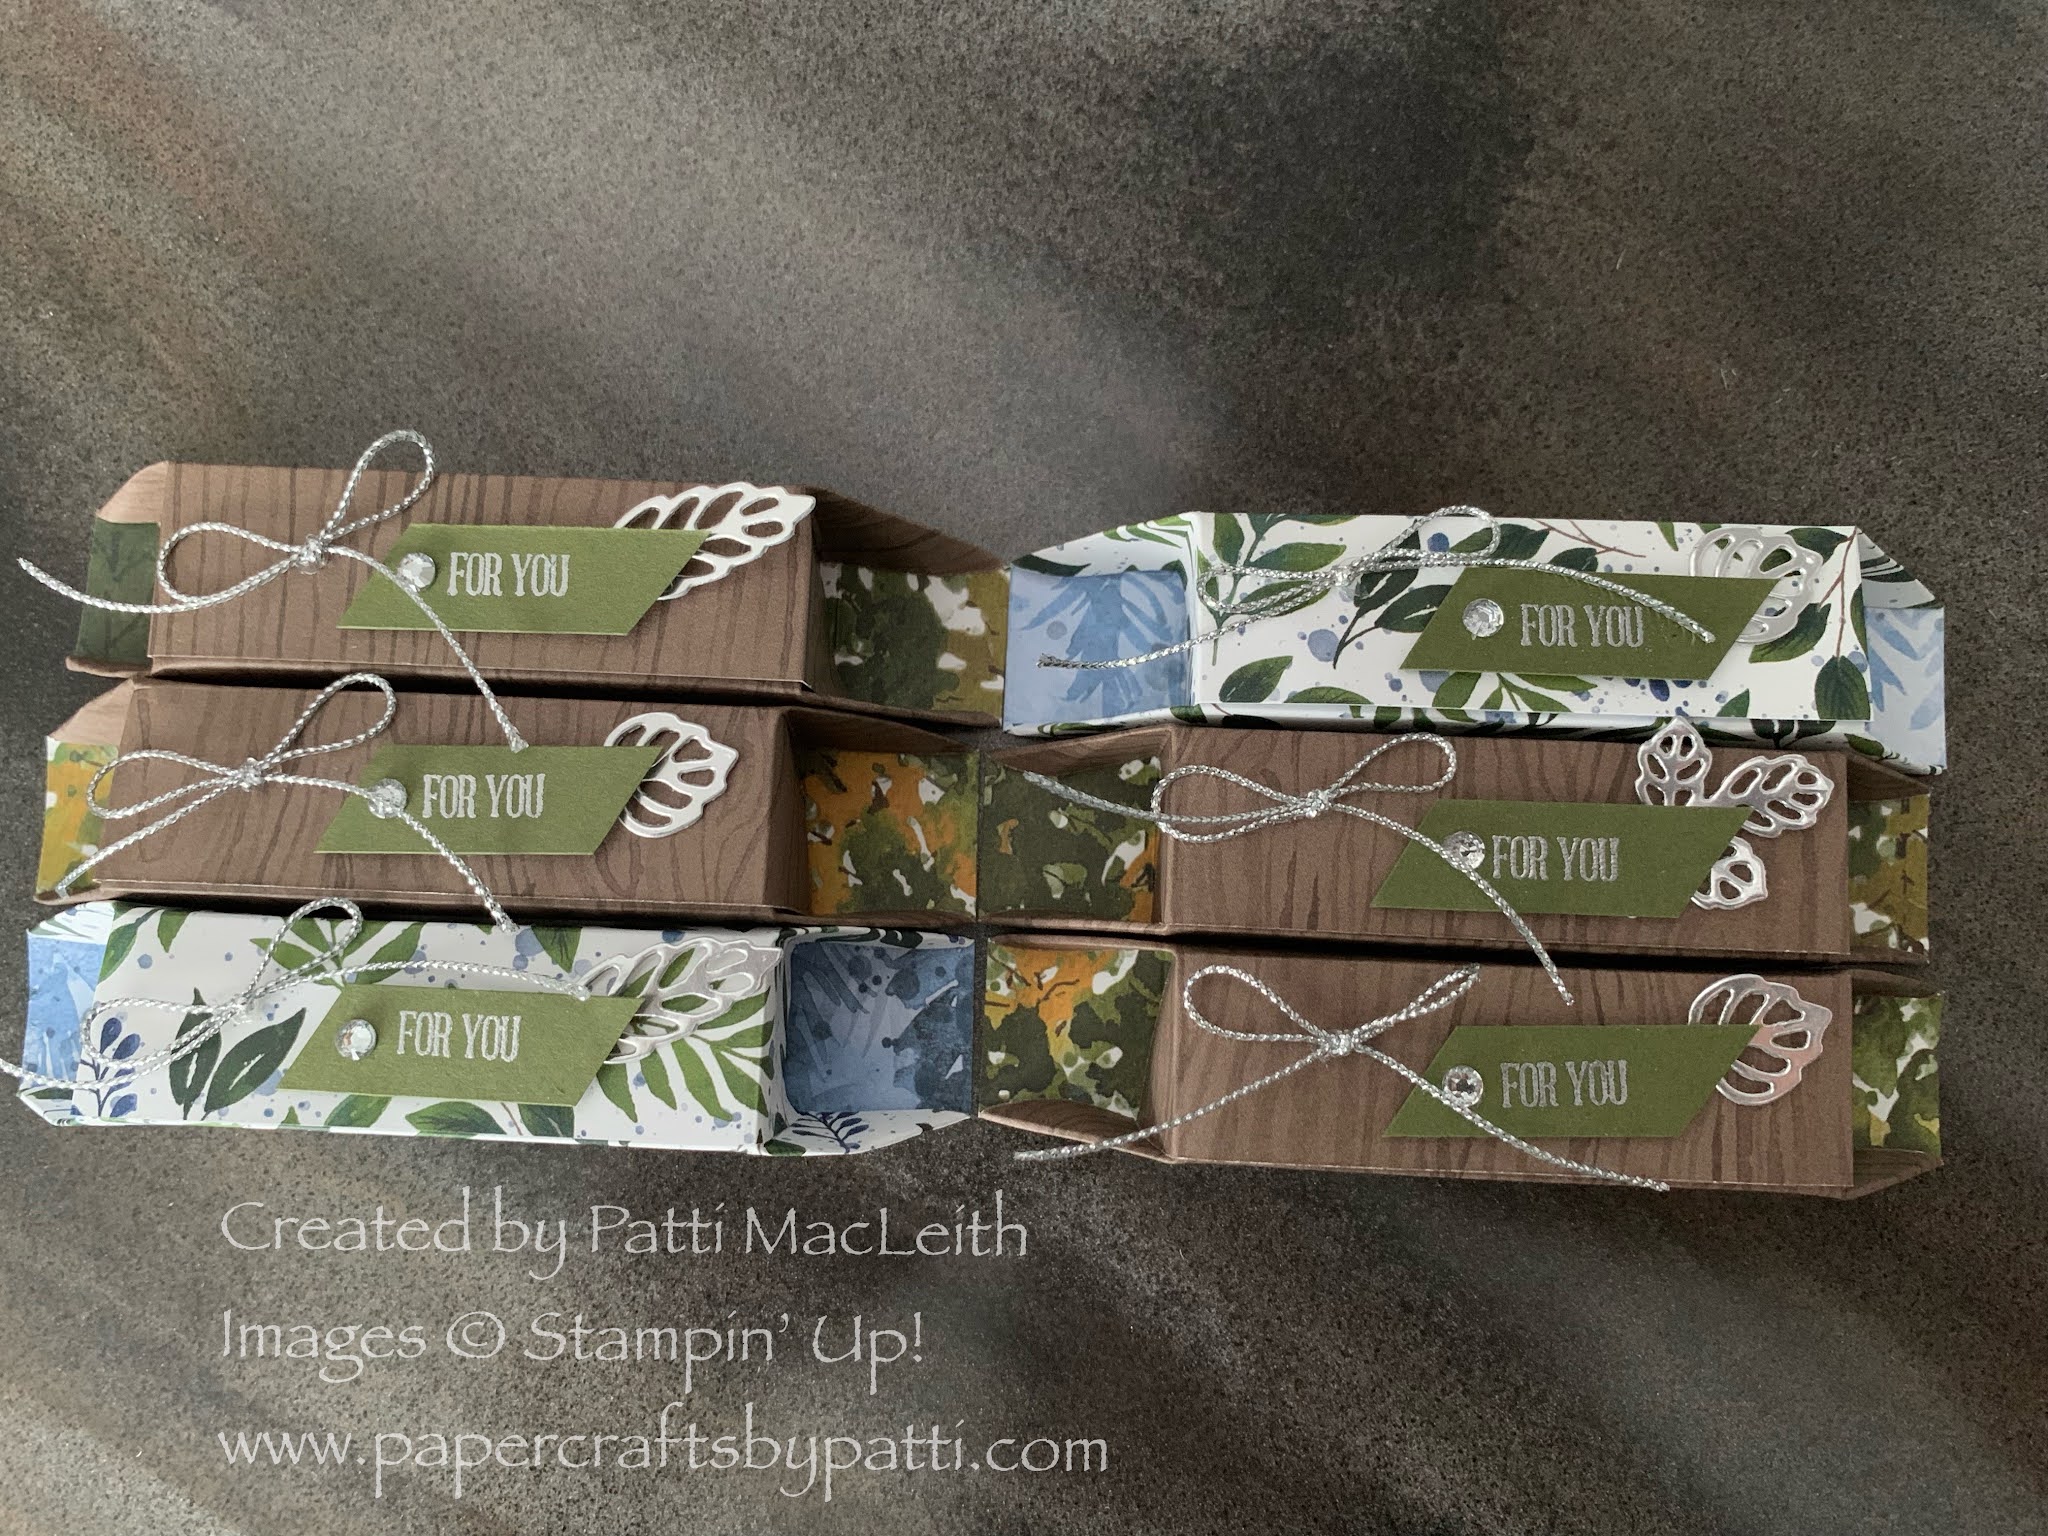
We made three gift cards and a sweet mini pizza box to keep them in. It could also be a gift that you bring to your host at a dinner party during the holidays, OR you could use the box to put a little something sweet at a table place setting. The possibilities are endless!


This sweet checked card shows off the color scheme I chose from Festive Farmhouse Designer Series Paper, the 5/8" Striped Burlap Trim and the Merry Little Christmas sentiment from the Peaceful Noel stamp set.  The Festive Farmhouse Cotton Twine will help tie this card onto a package.


Next I used the leaves and berries stamp from the Feathers & Frost stamp set, stamping them onto Whisper White card stock using VersaMark and Cherry Cobbler Embossing Powder. I colored in the leaves using So Saffron Stampin' Write Marker and the berries with a Cherry Cobbler SW Marker. JOY is from the same stamp set and it's embossed with Silver Embossing Powder. The ribbon being the sentiment is Cherry Cobbler 1/4" Double-Stitched Ribbon. The chord is retired stretch silver.


Lastly, this sweet bird from Feather & Frost finds a home in the center of a Boxwood Wreath Embellishment. I bought the wreaths over a year ago, but hadn't used on yet! The bird is colored using Dark and Light Smoky Slate Stampin' Blends and a So Saffron marker. Behind the bird and wreath is a flag that I stamped using the new Buffalo Check background stamp. The chord is retired gold chord.

Thank you for looking today! Let me know if you have any questions on how I made these cards or the box. I'd love to answer them.

Use my Online Store to purchase your Stampin' Up! supplies any time.
Farmhouse Christmas Photopolymer Bundle 149941
Price$44.00

Buffalo Check Clear-Mount Stamp Set 147794
Price$15.00
Feather & Frost Photopolymer Stamp Set 147771
Price$21.00

Peaceful Noel Photopolymer Stamp Set 147694
Price$17.00


post signature

Wednesday, September 5, 2018

Two Of My Favorite Things...

**Update: See the comments for measurements and brief instructions to make this tea bag and chocolate holder!


For the inaugural stamping session in my new craft studio, I invited 7 good friends to a tea. We crafted, then we had a tea luncheon and then we crafted some more! These are the favors that I made for each guest. (You can come back tomorrow to see the project each guest made - HINT: CHRISTMAS/HOLIDAY CATALOG!)


I did use some retired products, but I'm really glad I still have them! I used the specialty paper that is behind my sentiment and decoration. It has rose gold accent "bubbles" all over it and my tableware was gold, white and pink. The decorations were made using Springtime Impressions Thinlits, Mini Treat Bag Thinlits for the "enjoy" (retired) and Sweet Cake Framelits for the Soft Sea Foam leaves. The vellum leaves were cut out using the Flourish Thinlits. The vellum stitched banner behind the "enjoy" is from the NEW Farmhouse Framelits Dies, which is available starting today!

Farmhouse Framelits Dies147922
Price$32.00
I love the details on these thinlits! You can save 10% if you purchase the bundle, which includes the Farmhouse Christmas stamp set:

Farmhouse Christmas Photopolymer Stamp  148478
Price$17.00

Farmhouse Christmas Photopolymer Bundle149941
Price$44.00

I will be showing some festive Farmhouse projects when it gets closer to Christmas.


The inside of my tea party favor holds my favorite things - tea and chocolate! There is a Stash Earl Grey tea bag and a Ghirardelli chocolate square. YUM.

I'm celebrating the Holiday Catalog going LIVE today by putting together my order. I have some $5 coupon codes that I earned in August to help me save money. Don't forget to use your codes before they expire on September 30th!

 CLICK HERE to VIEW CATALOG PDF

Thank you for visiting my blog! I hope you will use my Online Store when you order your Stampin' Up! products! I always send a hand made thank you card for each order!
post signature